
There’s multiple ways to kill a fish to eat. Some are quick and clean, some not so much. The specific method of how to kill and store a fish may vary by species, but there are some fundamental practices that are true with all types of fish. The specifics on whow to kill a trout is going to be different than how to kill a walleye for example. The more humane methods all involve destroying the fish nervous system near the head, to make the death as immediate and painless as possible.
How to humanely kill a fish?
Stabbing. The most humane method to kill the fish also seems the most brutal. Where to stab a fish to kill it though? A quick and firm stab and swish to the brain will immediately kill the fish. This quickly prevents any suffering, keeps the fish from flailing, and helps to maintain meat quality.
Using either a dedicated tool, Stout fixed blade pocket knife (Amazon Link), or even small (as in narrow) screwdriver, stab into the brain cavity of the fish. You then swish the tip of the tool around to ensure you completely destroy the brain and kill the fish. The fish is dead within the second. This technique works for any species of fish of any size, but is particularly useful on large fish, or fish with thick bones, where other methods may not be as effective.
You’ll know you hit the brain because the fish will go stiff, and it’s fins will stick straight out. If done correctly, there will be a brief period where the fish stiffens. This followed by the fish being mostly unresponsive afterwards, with maybe a few nerve twitches within a few seconds of performing the procedure.
The site Ikejime.com (named after the Japanese technique Ikejime of killing fish to maximize meat quality) has an excellent online tool for locating the exact location of the brain in a large number of different fish species.
You might think that finding the brain is pretty easy, this is true in some species (like when killing trout and bass). Sometimes a fish brain is surprisingly difficult to locate. For example, I initially thought a flounder’s brain was between it’s eyes. I was incorrect. The brain is actually further back on it’s head, closer to the gills. I didn’t know about that site when I discovered this though, and had to do a dissection on a retained flounder to figure it out.
Cracking the neck
Cracking the neck is a very common method of killing fish. It’s the method I grew up using to kill pan sized brookies we caught out of the ditch back home. The method works well on certain species of fish, and usually only if they’re smaller sized.
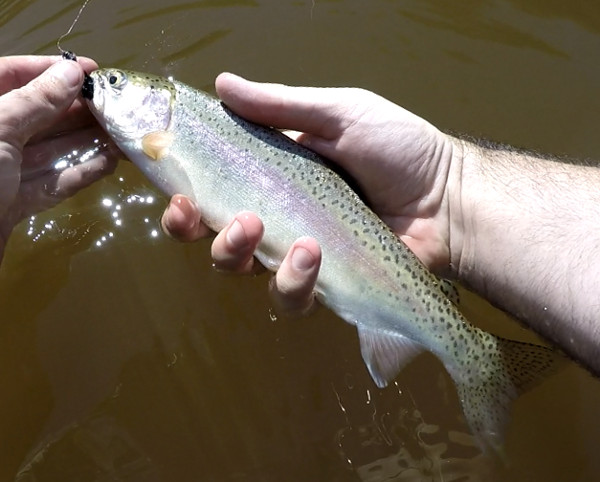
Grab the roof of the fishes mouth, and pull back until you hear the neck snap. That’s it. You’ve severed the fishes spinal cord, and killed the fish relativity quickly. It’s not as immediate a death as stabbing the fish in the brain, but it’s still fairly quick. It also doesn’t carry the risk of missing the fishes brain.
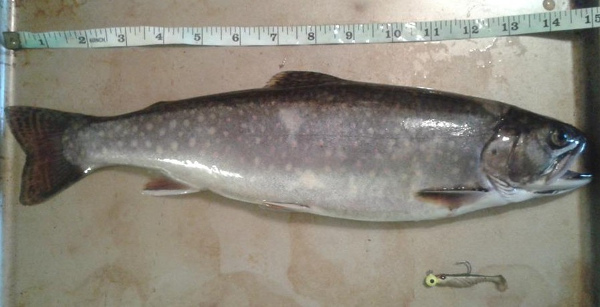
This technique does not work on large fish. Just try doing this to a large striped bass or twenty plus inch trout. You’re not breaking either of those fish’s necks using this method, certainly not quickly and cleanly. I wouldn’t use this method on a trout any bigger than say 15″ or so (the pictured brook trout would be about the largest I’d try this method on).
Some other fish such as panfish and flounder have heads shaped in such a way that makes this method either impractical or impossible.
Blunt force
This is another method commonly used to kill a fish. It involves either smashing the fishes head with something (like a fish bat), or onto something (like a rock). This either destroys the brain, or severe’s the the spine immediately behind the head.
I’ve tried this with mackerel before, but have found it a bit messy. If you’re smashing a fishes head against a rock hard enough to kill it, blood is going to go flying out of the mouth. I suppose a fish bat may lesson this a bit. I already carry enough equipment with me, and I don’t need a large and heavy bat to add to that.
If done right though, smashing the fishes head in can still kill it quite quickly. The problem is it’s easy to “miss the mark” on the first smash, so it’s not always as quick as other methods.
I much prefer the knife to the brain method. Using blunt force is just too messy, inconvenient, and (possible, if done incorrectly) inhumane for my liking.
Bleeding
Many fish benefit from being bled. But bleeding is used more often as a way to retain meet quality, and generally shouldn’t be the method chosen to actually kill the fish. I recommend killing the fish using one of the above methods if possible before bleeding it. If you don’t kill the fish before you bleed it, the fish may thrash and spray blood everywhere. It’s also a slower death, unpleasant to both you and the fish.
To bleed a fish, cut into the gills from the bottom of the fish. Let the blood spill out while holding the fish vertically, head down.
In general, larger or more oily fish tend to benefit from being bleed more than other types of fish. As with anything there is exceptions to this rule. It’s worth researching details on the specific fish you plan on keeping, to see what works best for other anglers. For example, the only fish I bleed is mackerel. Mackerel is an oily fish than tends to go bad quickly, and bleeding the fish helps limit this.
You can go a step further than bleeding. You can gut the fish, being sure to leave the head on. In my area it’s necessary to leave the head on until you get home so the conservation officers can properly identify and measure the fish. Check you’re local regulations to see if there are any legal requirements in regards to storing fish in your area.
Best way to store fish until you get home
A Cooler (Amazon Link) with lots of ice or a number of ice packs is by far the best way to store fish. A fish that’s gutted and stored on ice can be kept that way for the better part of the day, close to 24 hours. When you get home, put the fish in the fridge, freezer, or frying pan ASAP.
Some fish are quite slimy, and that slime can spread all through your cooler. You can wrap the fish in either newspaper, or a plastic bag before putting them in ice. This will reduce the amount of slime that can get everywhere. Generally, it’s a good idea to have a dedicated cooler for storing fish. This makes slime, blood, and scales less of an issue.
If it’s legal in your area you can also fillet the fish in the field, seal it, and put it on ice. If you have a vacuum sealer and can run it off your vehicle that’s even better. This method is not legal in all areas though, and you may have to wait until you get the fish home before you can fillet it. Best to check your local regulations.
What about a creel?
If you’re wading, you could keep a cooler onshore if there’s no one around that might steal it. That’s not always an option though. Sometime’s there’s lots of people on shore, other anglers that will take you spot, or you’re covering alot of ground.
Creels have been used for hundreds of years to store fish, and were traditionally use when trout fishing. They’re a wicker basket that allows air flow around the fish to keep them fresh. When using a creel, put some damp grass on the bottom and between fish to help keep them cool and damp. You do still kill the fish before putting them in the creel.
Creels (Amazon Link) work best in spring, fall, and winter, but I wouldn’t use them in the summer. They can’t keep the fish cool enough during the high heat of the summer months. If you’re fishing when it’s really hot, best to stick to a cooler or practice catch and release.
A creel sits on your chest or hip, so it’s convenient to carry around a steam with you when you’re wading. A drawback to the creel’s portability is that it may not hold very large fish.
What about stringers?
 Stringers can be a perfectly acceptable method to keep your catch, but two criteria need to be met. First, the fish has to be dead already, and secondly the water has to be relatively cold (I’m assuming you’re floating the stringer and fish in the water).
If you keep a live fish on a stringer, this causes stress to the fish. In addition to being inhumane, this can ruin the meat. This is especially true with trout and other salmonids, as the meat will rapidly decline in quality if you don’t kill the fish before putting it on the stringer. This happens because the trout releases lactic acid as it struggles and gets stressed out, which results in the mushy meat. This process happens in all species of fish, but affects salmonids particularly badly.
If you kill the fish and put it on a stringer that’s fine, as long as the water is cool. If the water is warm, it will cause the meat to spoil more quickly. This may be okay for very short term (think less than a half hour), but you really want to get the trout in a proper cooler, or even a creel as soon as possible.
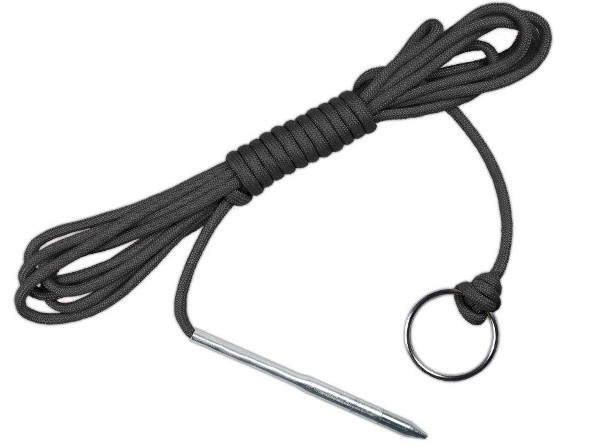
I don’t like using stringers for trout, but I do frequently use a stringer for flounder. A simple Para-cord stringer (Amazon Link) like the one pictured above does the trick. Just insert the metal needle through the fishes mouth and out the gills, and pull it through the split ring to secure the fish.
How do I store my fish once I’m home?
I find the best way to store fish long term is to seal them and put them in the freezer. Prepare the fish in whatever way you intend on cooking them before you freeze them. So if you intend on cooking fillets, fillet the fish before you freeze it. If you intend on baking the fish whole, you can just freeze the whole fish.
To reduce freezer burn, seal the fish in a bag. A Vacuum Sealer (Amazon Link) makes this process much easier, but you can do an okay job without it. Put the fish in a appropriate sized zip lock bag, then partially close the bag, leaving only one corner of it open. Suck out the air with either your mouth on the bag, or with a straw. As you’re sucking, zip the bag closed while rapidly removing either the straw or your mouth. There you go, a semi-vacuum sealed piece of fish without needing an actual vacuum sealer.
What If I’d rather eat them right away?
What if you want to eat the fish soon and not store them? Some fish can be cooked right away, others should be left to sit for a few days. Trout is one example of a fish that’s better left to sit in the fridge for a few (2-3) days if you intend on pan frying them. If you intend on baking them though, they can be cooked right away.
If you pan fry an un-filleted trout the same day you catch it, the fish will not lay flat in the frying pan. The head and tail with curl away from the frying pan, making it difficult to cook evenly. I think this is because the muscles are still so fresh, and are constricting in response to the heat. Perhaps you’re adamant about cooking a trout immediately? You can reduce the curling by scoring (vertically) the length of the fish about a half-inch deep at multiple points (described further down).
To make cooking the trout easier, let the trout sit submerged in a bowl of water in the fridge for a few days. The water will get slimy, so I change out the water after the first day. The technique of leaving the fish in water doesn’t affect the taste much with trout, but can make other types of fish taste “washed-out”. For this reason, I don’t recommend this technique with all species.
Preparing fresh fillets
Cooking a fresh fillet off of a fish can be delicious. The same curling problem mentioned above can plague fresh fish fillets though, especially if you leave the skin on.
I tend to fillet my mackerel, and prefer to cook it the same day I catch it. I also quite enjoy leaving the skin on the fillets, but that causes major curling. To combat this, score the fillet a few times on the skin side. This allows the skin to constrict as it’s cooking without curling the whole fillet. You may still have to press down on the fillet with a spatula immediately after you put it on the pan. The fillet should lay flat for you after the first few seconds if you scored it.
The video below is a good demonstration of the scoring technique that I’m taking about. This scoring technique works on most species.
Some species have very large scales that makes leaving the skin on an unappetising option, and some folks just don’t like skin on their fillets. If this is the case, removing the skin is also an option. When removing skin off a fillet, a good fillet knife is a must. You want one with just a little bit of bend in it.
Lay the fillet skin side down on the counter or a secure cutting board. Hold the very tip of the skin with a paper towel at the back of the fillet. Start from the back of the fillet, and work the fillet knife (angled down) from the back to the front. The video below does an excellent job of showing how to remove the skin on a salmon fillet.
The above techniques work on a variety of different species. If you’d rather not remove the skin with a fillet knife, there are electric tools available that will remove the skin as well.
That’s it for my advice on how to humanely kill, store, and prepare your catch. I hope I answered any questions you had.