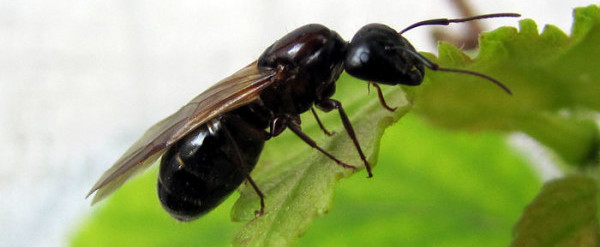
I remember as a kid seeing hundreds of flying ants at certain times in the summer. My grandmother called them pismires, which I thought was hilarious as a little kid (piss-mires). Fast forward twenty years and I suddenly find myself thinking about these pismires again, this time as a potential forage food for trout. There are two kinds of flying ants in my area that I’ve noticed on the river, the big black ugly ones that I remember from my youth, and a smaller red variety with hatches that rival that of even the most prolific mayflies. I’ll be showing you how to tie the big black variety of flying ant today, and will probably post a how-to on the smaller red variety sometime in the future.
Flying ants are the queens and drones of an ant colony, and perform a mating flights with numbers often matching traditional hatches of mayflies, stoneflies, and caddisflies. After the mating flight, the males die and the females will land in search of a location to start a new colony. The prime time for fishing flying ants is during the mating flight, but as you can imagine the queens often wander into a river when looking for a new colony site so the pattern can be fished for a days to weeks after the flying ant “hatch” depending on the species.
The fly shown below is a big ugly pattern meant to imitate a big ugly bug. The proportions and colour of the flying ant will differ based on species and geographical location. The black variety in my area is similar to the first picture in the post, but with a smaller thorax and head. The most prominent feature of this species is a very large abdomen.
Material list:
- Black foam
- Black thread
- Elk Hair or Deer Hair. I prefer elk hair for this pattern, but feel free to experiment.
- Dry Fly Hackle
- A long hook. I use a size 8 Mustad streamer hook. The heavy use of of foam on this pattern keeps the heavy hook afloat.
How to tie an elk hair foam flying ant
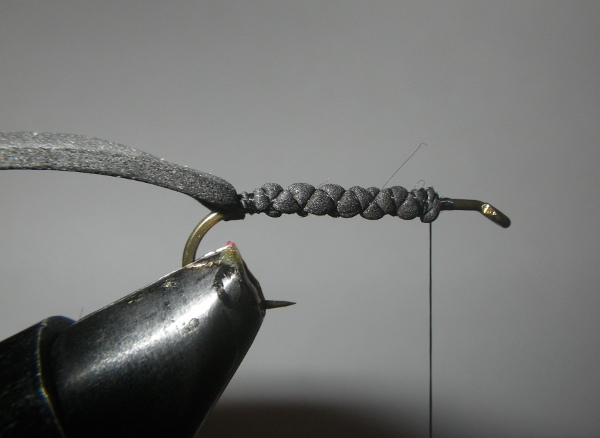
Step 1: Select a size 8 Mustad streamer hook (or something similar) and mash the bard in the vice.
Step 2: Cut a strip of black foam, you want the foam piece to be as long as possible.
Step 3: Tie foam strip onto the hook shank. There’s no need to make the thread wraps overly tight.
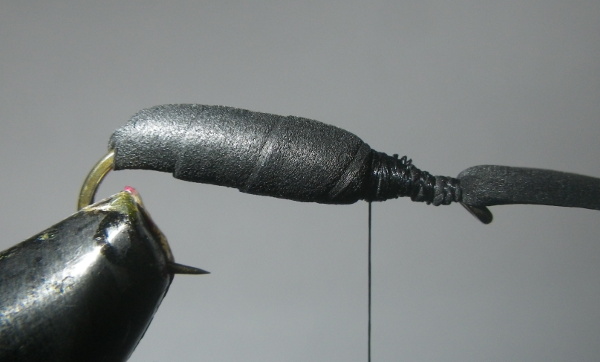
Step 4: Wrap the foam piece around the hook shank forward, backwards, and then forwards again or however many times is needed to achieved desired body shape and thickness. A trick to creating a smooth body is to stretch the foam slightly as you wrap, just do this on the last few wraps though, as it reduces buoyancy slightly.
Step 5: Tie the foam in place after you are done wrapping. The foam body may try to unravel when you do this, hold the foam in place with your fingers and wrap the thread back over the body slightly to secure it in place. It helps if the thread wraps are in the same direction the foam was wrapped around the hook shank. When tying down the foam, make sure a piece extends beyond the hook eye.
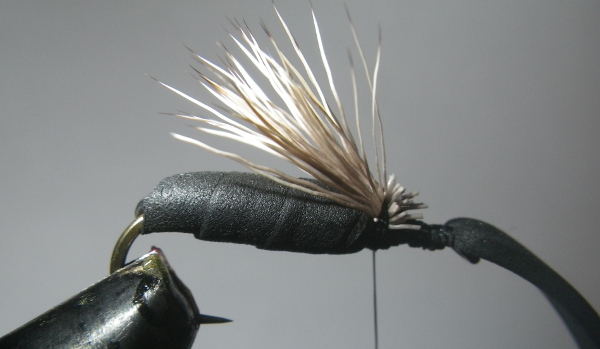
Step 6: Make sure your thread is positioned right in front of the foam body.
Step 7: Snip a small clump of elk or deer hair from the hide. Stack the elk hair in a stacker to align the tips.
Step 8: Tie in the elk hair clump the same way you would with a elk hair caddis pattern. You don’t want to elk hair to flair to much, so don’t wrap your thread as tightly as you would with a elk hair caddis.
Step 9: Trim the butt ends of the elk hair quite close to the thread wraps. a small drop of head cement or hard as nails applied to the thread wraps at this point couldn’t hurt.
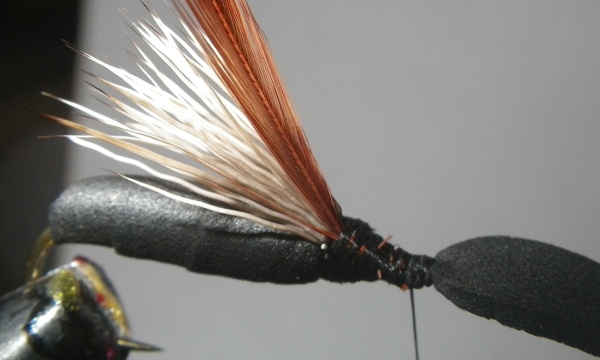
Step 10: Tie in a piece of saddle hackle. I find using a hackle size slightly larger than the hook gap looks good. To prevent the feather from slipping out, I always trim the bottom fibres to create little “teeth” to keep it in place when I tie it in.
Step 11: Create a tapered head with your thread wraps for the feather to wrap over. If wanted, you could add a small amount of dubbing at this point.
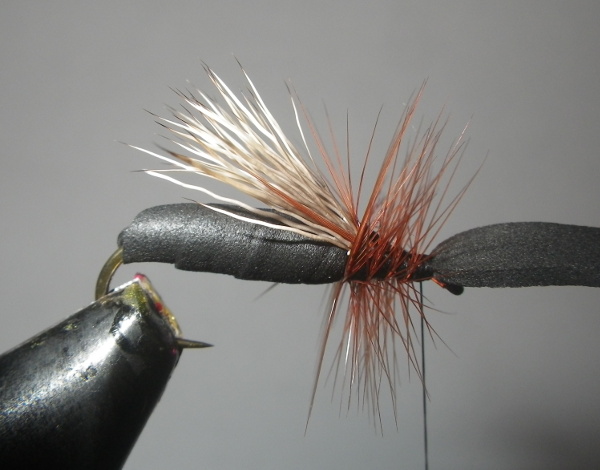
Step 12: Do about 4 wraps of the feather and tie in right behind the hook eye.
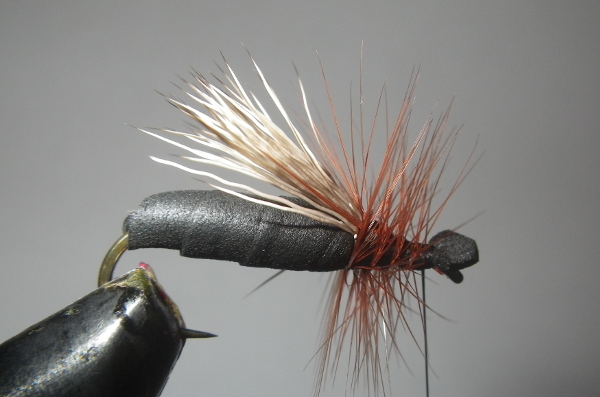
Step 13: Trim the foam head to desired size and shape. I like to cut it off straight and then cut each corner to create a hexagonal head.
If you buy anything below, I get some beer money (commission).
Step 14: Whip finish and apply a drop of head cement or hard as nails to complete the fly.
Like I said earlier, it’s not exactly a pretty pattern, but it does a good job of imitating the naturals. As a bonus, it’s all foam body coupled with the elk hair makes it float like a cork! I’ve successfully caught both brookies and rainbow trout with this pattern, but I’d imagine it would make an excellent smallmouth bass or sunfish dry fly as well.
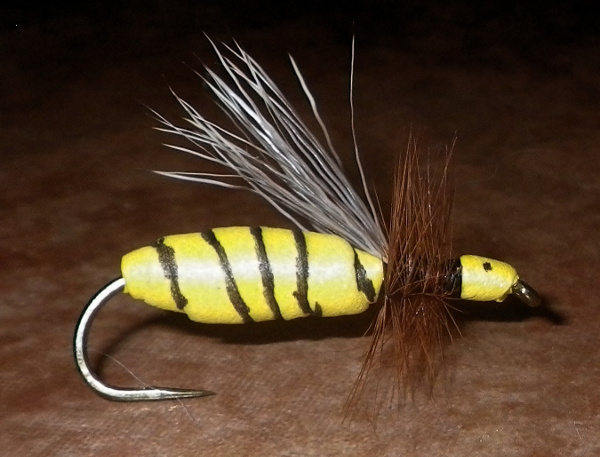
Since the body is foam, you can substitute any colours in place of black. I tied a slight variation of this pattern in yellow and it makes a pretty good hornet imitation. I did a few more foam wraps to make a thicker body, did an extra foam wrap to create the head, and added stripes to the body with a sharpie.

Ben, do you ever take the time to segment the body a little more clearly defined?
I haven’t with this particular pattern, but it would be quite easy to do if you wanted to use two strips of smaller foam instead of one.
Decent fly Ben
Funny that you post now as I witnessed a hatch yesterday and was thinking of tying a few today.
Yep, the foam ant is a killer on bluegills and bass in the ponds I fish in Bama. I use Rainey’s Float Foam to tie a very similar ant. Summertime and ants just go together.